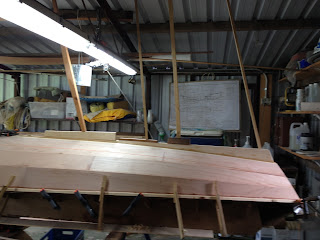
It has been a week since the last post, quite a lot of time spent int he boat shed and my shoulders ache from hand planing! There doesn't seem to be a way to avoid it. I'm a great fan of power planes but in some places the risk of damage is too great.
The start of the planing was bringing the edges of the garboard planks down flush with the top of the keel. It was awkward reaching up and out to the middle of the boat to do this planing so I climbed up onto the hull to get a better approach. Once done I could prepare a 5 meter long length of 100 x 6 mm hoop pine to cover the edges of the garboard plank. This had a scarf joint in the middle and once ready it was glued down using about 40 200 mm square pavers to hold it down. Once the glue set I climbed back up onto the boat to plane the edges of this keel trim flush with the garboard plank. Unfortunately I didn't take any phots while I was doing this.
The cutwater is made up of 6 x 4 mm thick laminations of hoop pine. Clamping them onto the stem was a tricky exercise involving clamps, threaded rod and a prop from the garage door. I did a trial run of this at the end of the day intending to leave it overnight to encourage the laminations into their new shape. Unfortunately I forgot the prop which was bearing up onto tilting door of the shed and when I closed the door there was a loud bang and stuff flew everywhere. Fortunately no damage done but I set up a notice to remind myself not to do it again when the glue was going off!

While the cutwater was being glued I set up the outrigger arms and the buoyancy tank for gluing. The arms are bolted down to a flat surface using bolts 1600 mm apart. The buoyancy tank is propped up on four legs behind the arms. Two plywood gussets have to glued to the arms, each gusset has 3 holes which have to line up exactly with the 3 holes in the end of the tank. One bolt passes through the gap between the inside ends of the arms (at the top). The other two bolts pass over the arms and just touch them. Glue is applied to the arms and gussets, the 3 bolts tightened into captive nuts inside the tank and an additional clamp used for good measure. Because the bolts were very close to glued surfaces I smeared them with wax to prevent the epoxy getting hold of them.

The next photo shows the skeg being glued into place using props from the shed roof. This was straight forward but shaping the skeg which tapers from 25 mm thick at the keel down to 19 mm thick at the top edge involved more hand planing.
The gunwales are made up of two laminations; the inner one is Western Red Cedar, light and easy to work. The outer lamination is hoop pine, heavier but tougher to take the knocks. The next two photos show the outer lamination being glued in place. There are a mixture of clamps being used and also so brads through scraps of plywood to stop the joint squirming about.
Before the gunwales could be glued on the cutwater had to be faired to suit the angle of the planks. Because the garboard plank twists as it comes to the stem the angles are constantly changing. This was the main cause of the aching shoulders! It is hard planing on a near vertical surface and a lot of the work had to be done with a rebate plane because of the changing angles. Eventually it was done!
I will do a bit more cleaning up of the outside of the boat and then turn it over. I wonder what the inside of the hull will look like? There will be squeezed out epoxy to clean up but I hope the joints will be tidy enough for me to varnish the inside of the boat.


