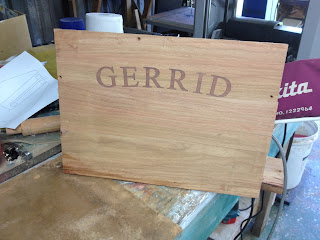
Now you are probably wondering about the name and why. Remember, Google is your friend! You can't see it but the same inlay is on the other side of the board.
Before the transom could be glued to the end of the keel the keel was lifted off and the edges cleaned up, ie excess epoxy removed. The protective tape, so the hull doesn't stick to the mold was replaced, and the keel put back on the mold. The transom was glued to the end of the keel and screwed to the mold through the corners which will eventually be removed.
Next step was to bevel the edges of the transom so that the planks will lie nicely on it and get a good glue joint. This bevel is tricky, the angle changes continuously. I started out with the power plane with the wooden arm. By riding the arm on the stringers and the next frame the plane cut the correct angle but was awkward to use on a convex curved surface. Then I noticed that my belt sander had a tapped hole in the side so I made a wooden arm to fit it. This worked like a charm and I made a perfect bevel quite quickly.
Here are the two tools with their outrigger arms.
Clamping the planks to each other along the stringers it tricky because a lot of clamps with a long reach are needed. Allan Will suggested C clamps and wedges. I have used this approach before but needed to make a new set. Here they are, various thicknesses of scrap plywood (10, 12, 14, 16 mm thick) cut on the bandsaw. THere are 50+ of them in the stack. They are used with wedges which I have a heao from previous boats.
Preparing the garboard planks (3 each side) involved cutting 50 mm long scarfs on the ends, a rebate or gain at the bow and stern and, because the transom is curved where the planks land cuts had to be made along the inside of the planks so it would bend to the curve.
Here a rebate is being cut in the standard way using a rebate plane.
Here is a plank with the cuts, they are about 12 mm apart and 200 mm long.
Here is a view from the stern with 4 out of the 6 planks fitted. The planks are held down by screws along the keel where the holes will be covered by the outer keel.
This is a view from the bow with the forward garboard sections being trial fitted. More of the Vee shaped blacks were needed to pull the planks together around the stem but using them avoided screw holes which would have been visible in the finished boat.
Last photo shows the stern section of the middle plank being glued in place. Pulling this planks down onto the curved transom was difficult and needed some messy work with a long clamp and a spanish windlass.


No comments:
Post a Comment